
We may earn money or products from the companies mentioned in this post.
This orange scone recipe with cranberries is super easy to make and you can have freshly baked scones from start to finish in an hour or less!
Besides a good recipe, the secret is in the technique, and we will show you exactly how to do that. We will also show you how simple it is to freeze unbaked scones so you can have them ready to pop in the oven whenever you need them.


These delicious scones are so easy and quick to make that they will be a huge hit with your whole family and all of your friends. They are one of our favorite things to make for breakfast or for brunch.
ORANGE SCONE RECIPE WITH CRANBERRIES
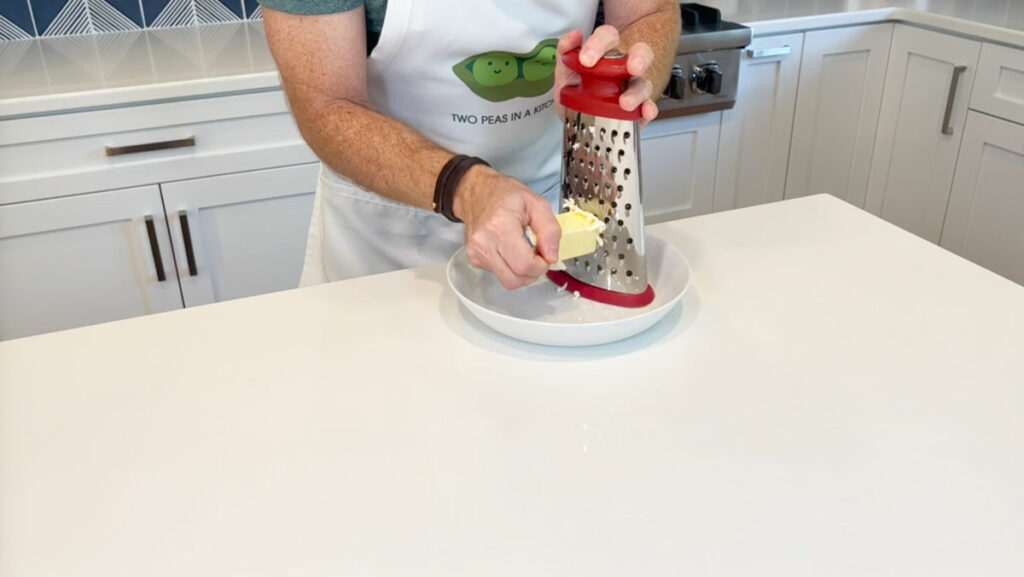
Easy Peasy Tip #1: Before beginning, place 1 stick of butter into the freezer for at least 10 minutes. This will help you avoid the tedious task of using a pastry cutter. One of the key things in scone making is using cold butter.
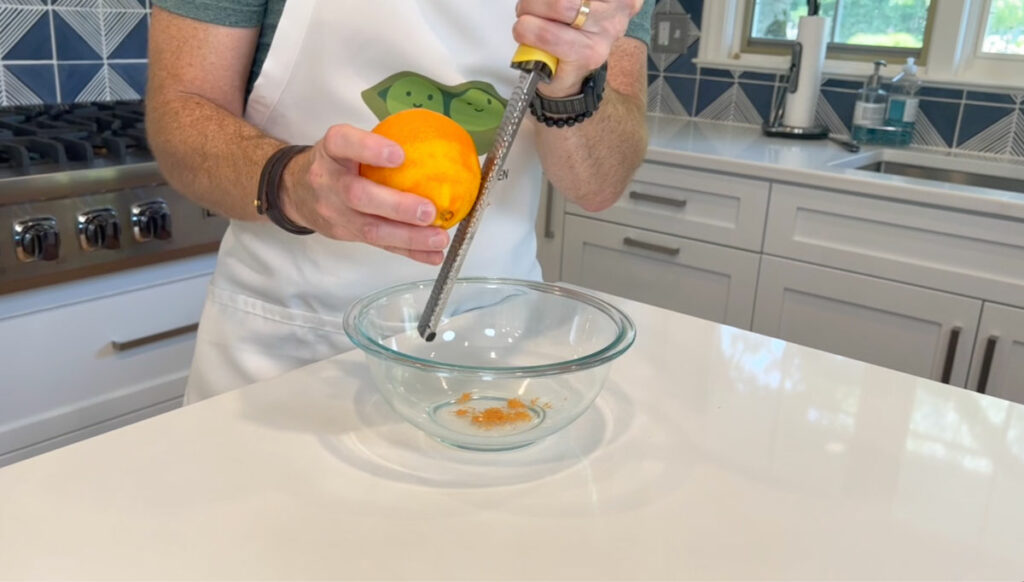
Next, zest 1 large orange. Use a microplane grater and only take off the top, thin layer of the orange rind. You don’t want to get into the white pith underneath the rind because this will taste bitter.

Mix dry ingredients. Into a large bowl, add 2 cups of all-purpose flour (275g), 1/3 cup sugar, 1 1/4 tsp baking powder, 1/4 tsp baking soda, 1/4 tsp salt. Mix everything up with a large fork.
Using a cheese grater (one with larger holes that you would use for grating something like mozzarella cheese, not a fine grater), carefully grate the entire stick of frozen butter.

Add the grated butter right to your flour mixture and mix it up with a large fork, breaking up any clumps.
Freezing the butter will prevent you from having your butter melted before the scones are baked. When it melts in the oven instead, it will create flaky layers and a lighter texture.
When you actually have small chunks of butter in the scone dough when you place it into the oven, the butter will melt and water will evaporate, leaving small pockets of air. This is what will create a flaky scone texture.
The last thing you want is melted butter before you actually get your scones in the oven!
Next, add the fresh orange zest to the mixture and mix lightly with the fork.
The orange zest alone is very fragrant and adds a sweet orange flavor without having to use orange extract.
Into the same bowl, add 1 cup of roughly chopped cranberries and mix until evenly incorporated.
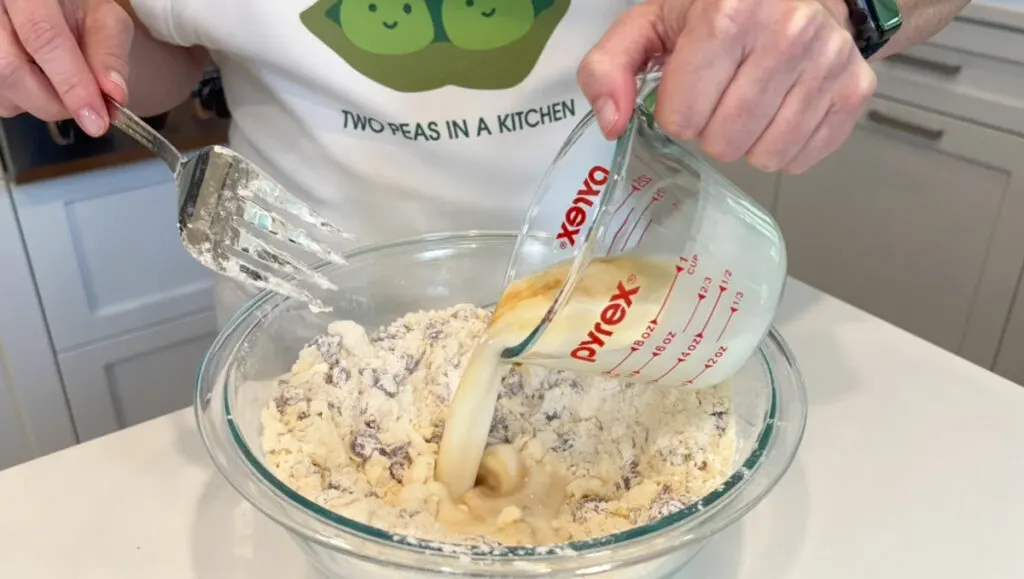
In a Pyrex measuring cup, add your wet ingredients in. Measure out 3/4 cup of cold buttermilk (right out of the fridge) and then add 1 teaspoon vanilla extract and mix together. Next, make a well in the middle of the flour mixture with your fork, and pour the buttermilk mixture into the well.

Use your fork to keep stirring until the flour is almost incorporated. You don’t want to over mix the dough otherwise your scones will be dense and not have the tender texture that you’re looking for.
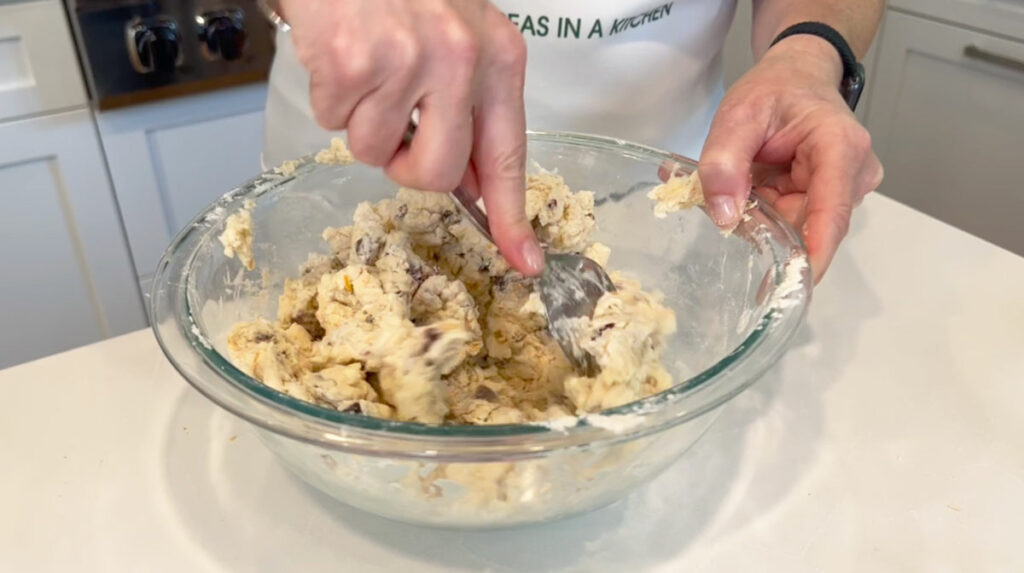

Once most of the flour has been incorporated, use your hands to grab the bottom of the dough ball and turn it upside down in the bowl. This will expose any of the flour that hasn’t been incorporated.
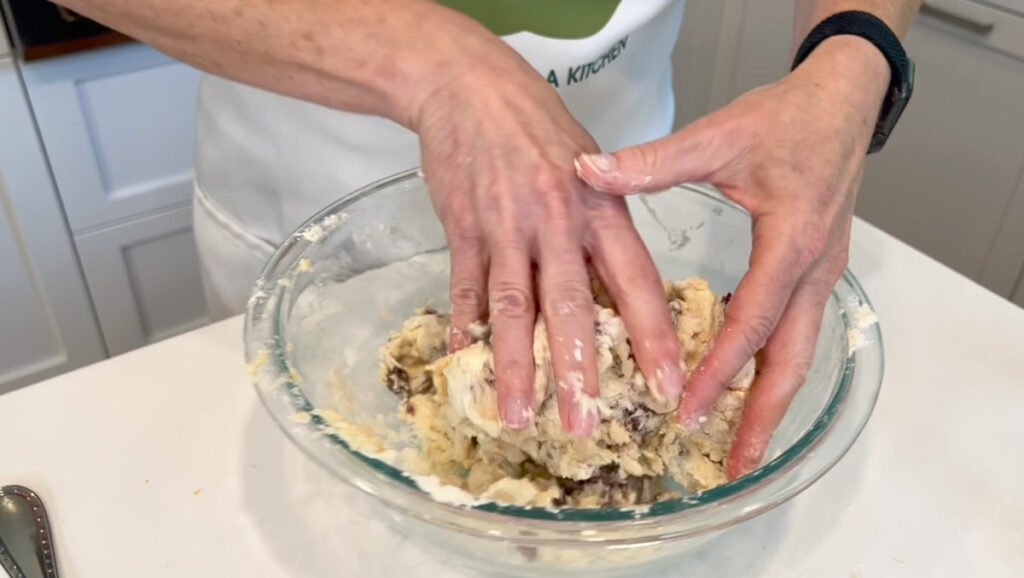
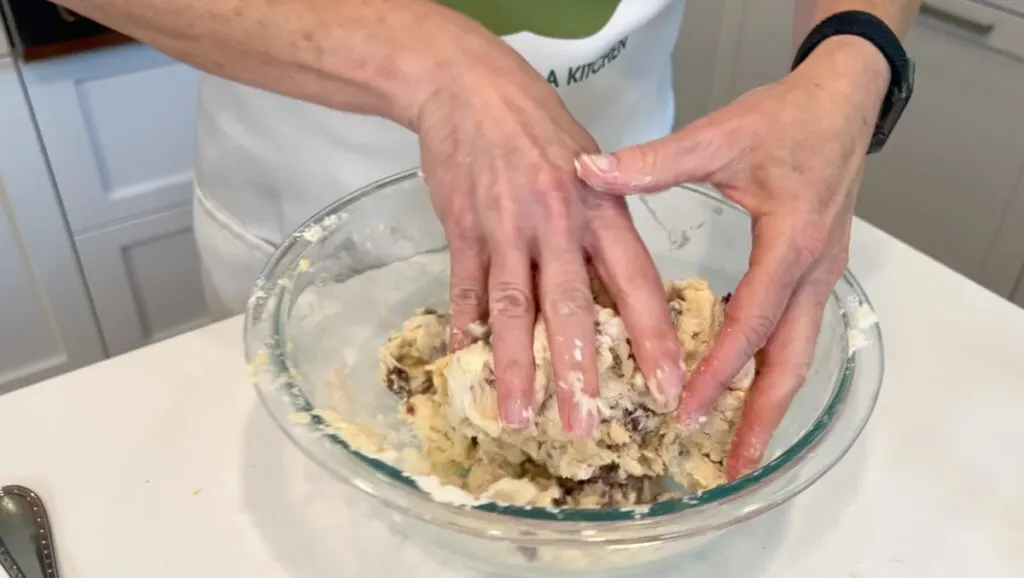
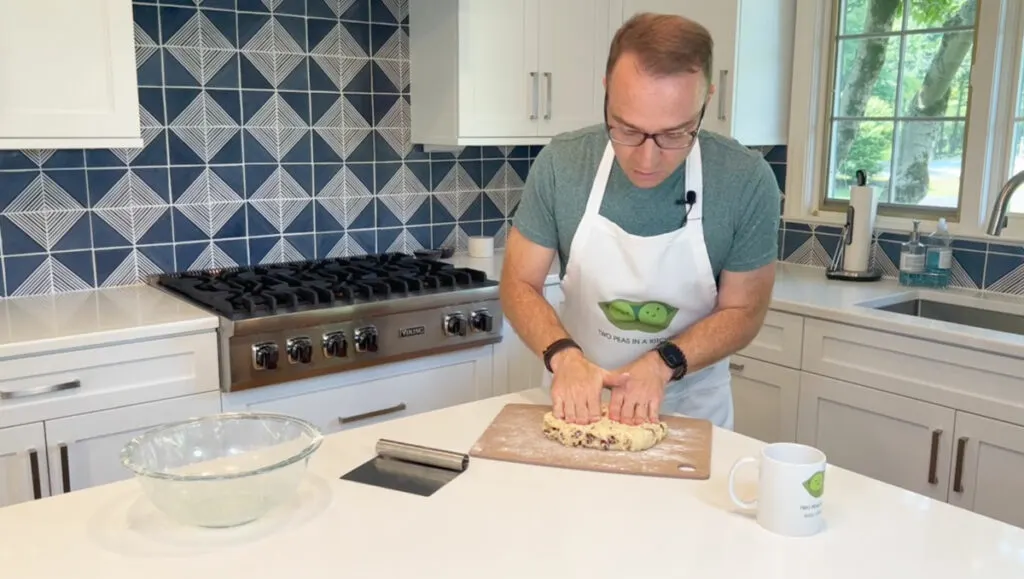
Gently keep turning the dough a few times with your hands until the flour has been mixed in. Use your hands to gently press it into one cohesive dough ball so it stays together.
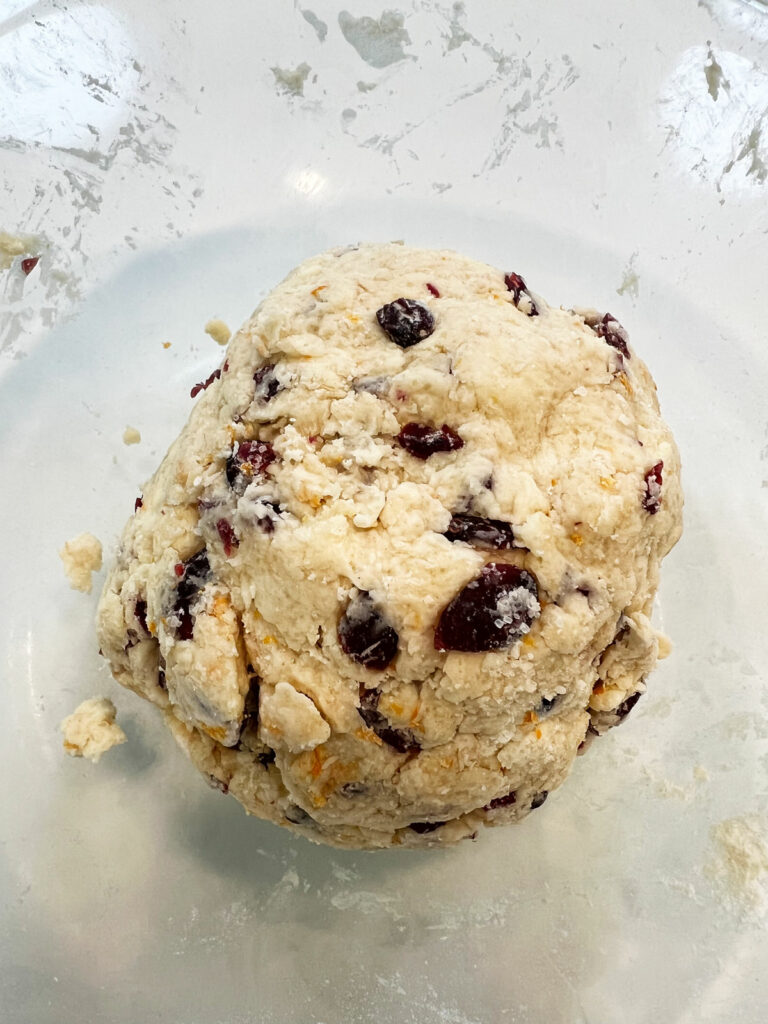
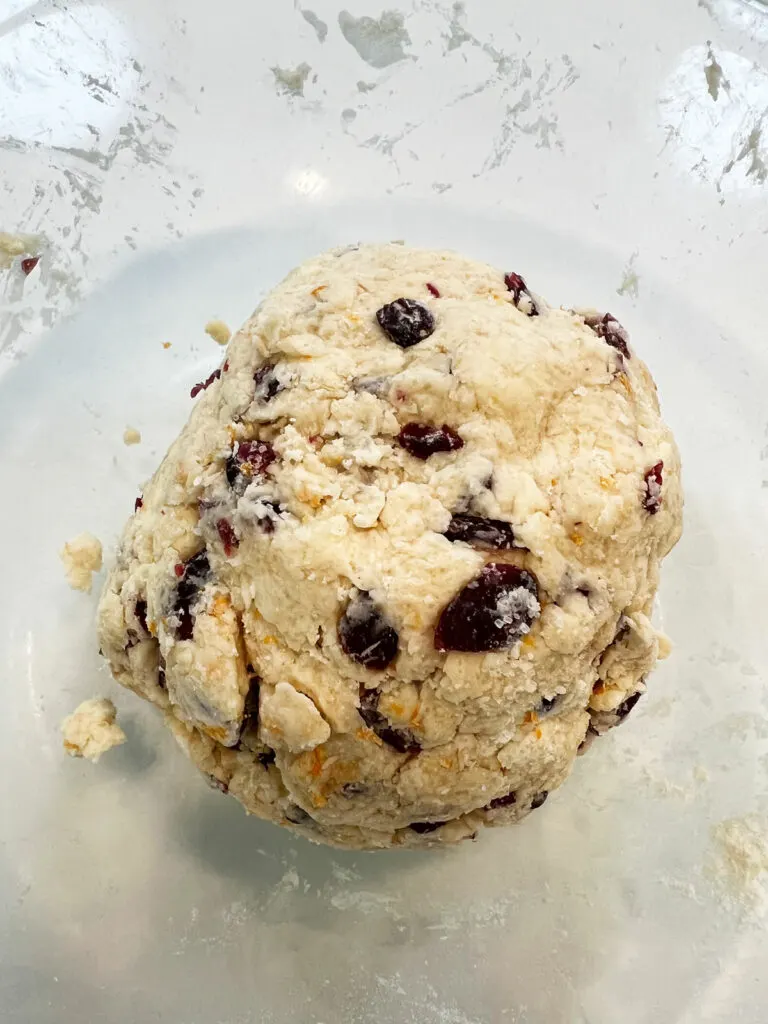
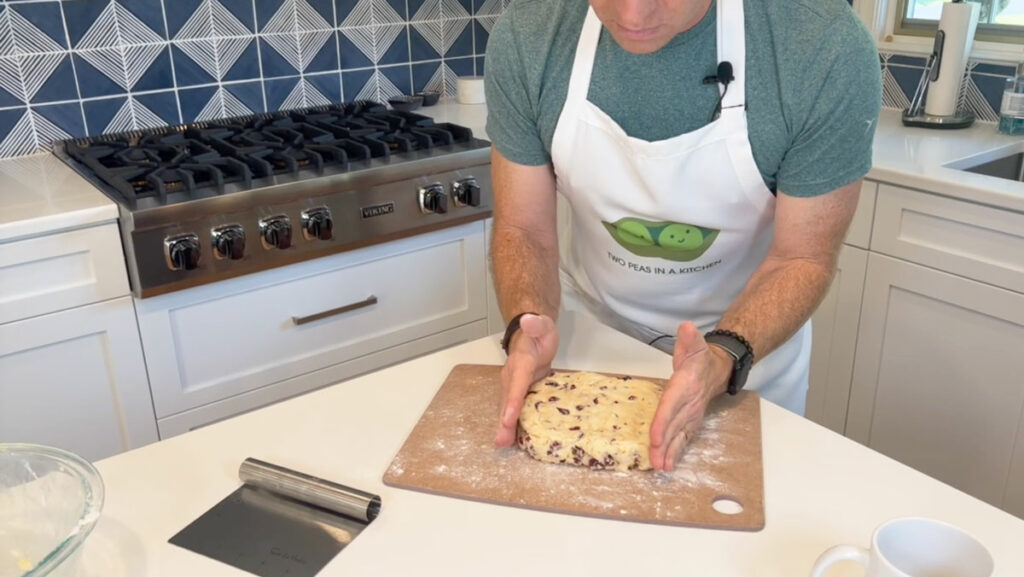
Pick up the scone dough ball with your hands and place it on top of a lightly floured cutting board. Gently press down until the disk is about 1 1/4 inches thick. There is no need to use a rolling pin.

Smooth out the edges of the disk with your hands.

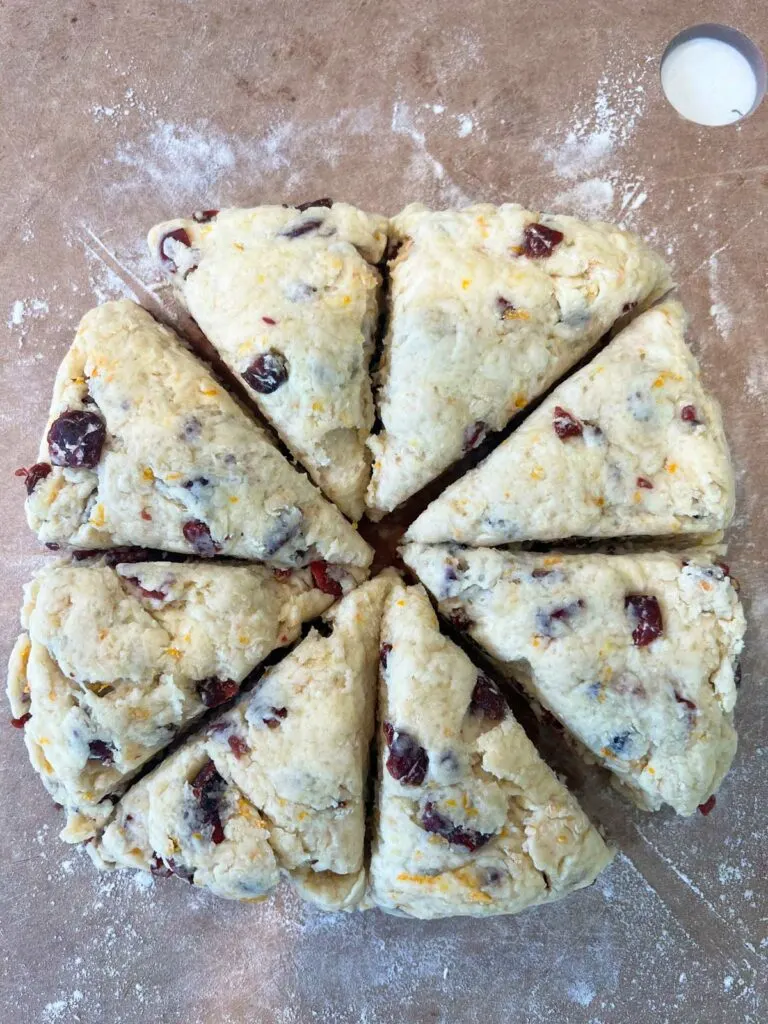
Using a stainless steel bench scraper, or a large sharp knife, cut the disk in half like you’re cutting a pie. Then cut each half in half, to make quarters.

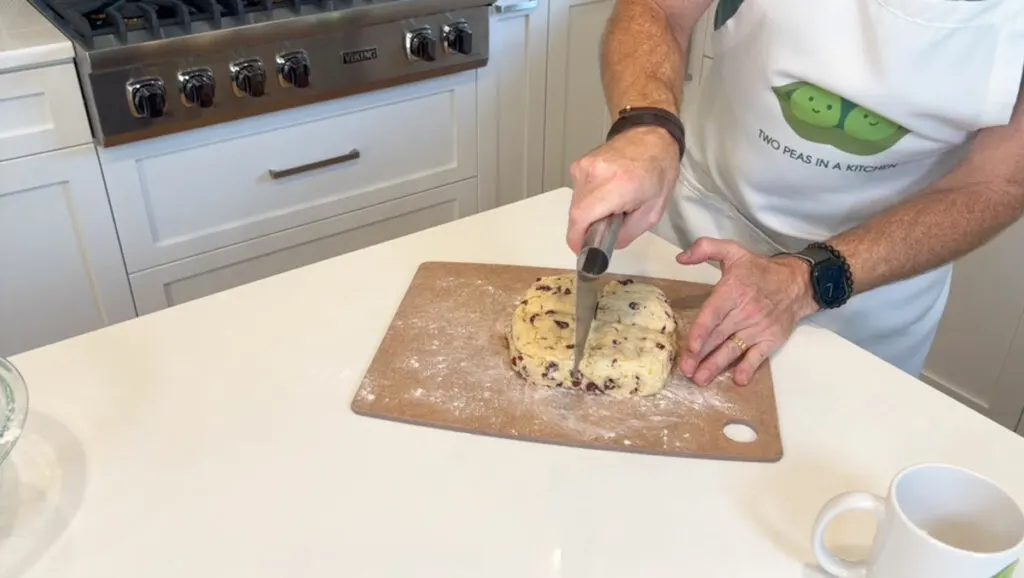
Then cut each quarter in half. In the end, you will have 8 larger scones of approximately equal size.

Easy Peasy Tip #2: You can also flash freeze the freshly cut scones to bake at a later time. Simply lay them on a cookie sheet, place it in your freezer for an hour, and then take the frozen scones and store them in a freezer bag for up to 3 months. When you want to bake them, continue on with the instructions below.
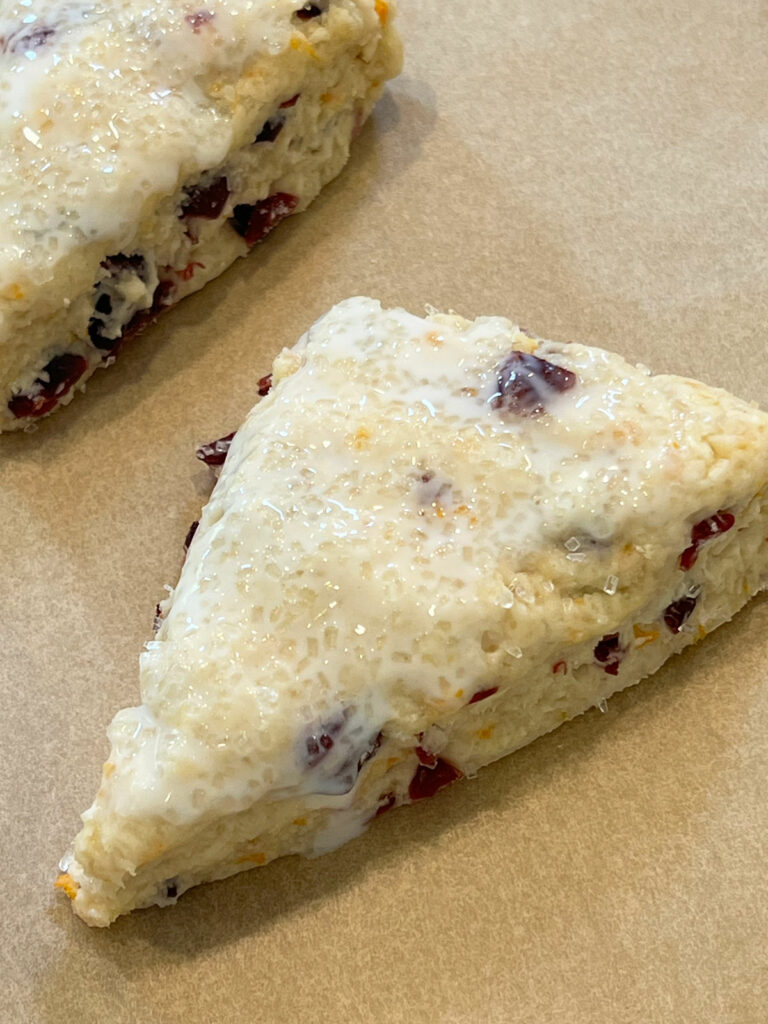
Use a pastry brush to brush the top of each scone with buttermilk.
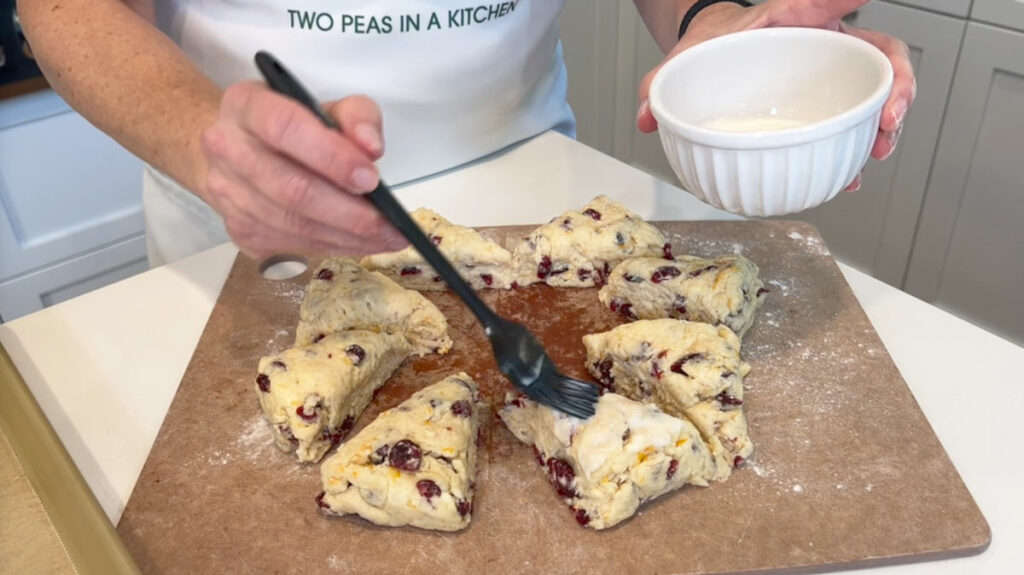

Next, generously sprinkle big crystals of sugar on top. This is optional, but it gives the top of the baked scones a nice sweet crunch.

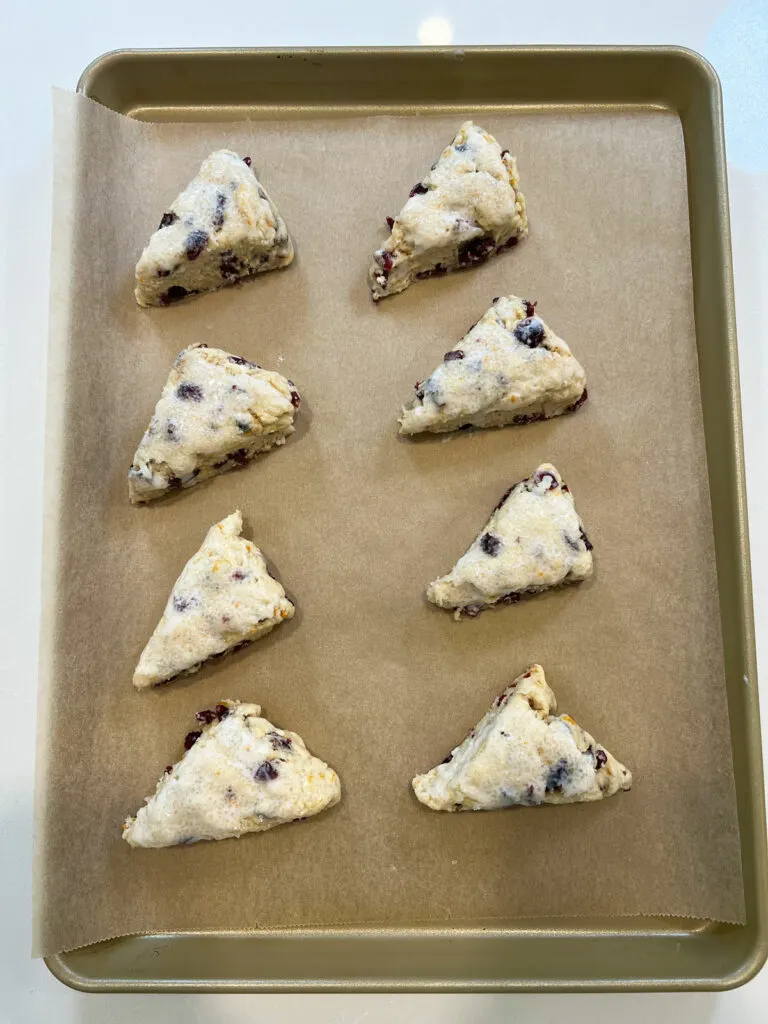
Line a large cookie sheet with unbleached parchment paper and place all the scones on top, leaving about 2 inches or so between each of the scones.

At this point, pre-heat your oven to 400°F. While you are waiting for your oven to get to temperature, place your cookie sheet (uncovered) into the refrigerator (or even the freezer if you have room). Leave for at least 10-15 minutes. This will solidify the butter, which helps to create a flakey texture.
If you had been storing your raw scones in the freezer (per the easy peasy tip #2 above!), then you don’t have to do the additional chilling while you wait for the oven to preheat.
Once your oven is at temperature, place your cookie sheet in the oven on the middle rack and bake scones for about 20 minutes.
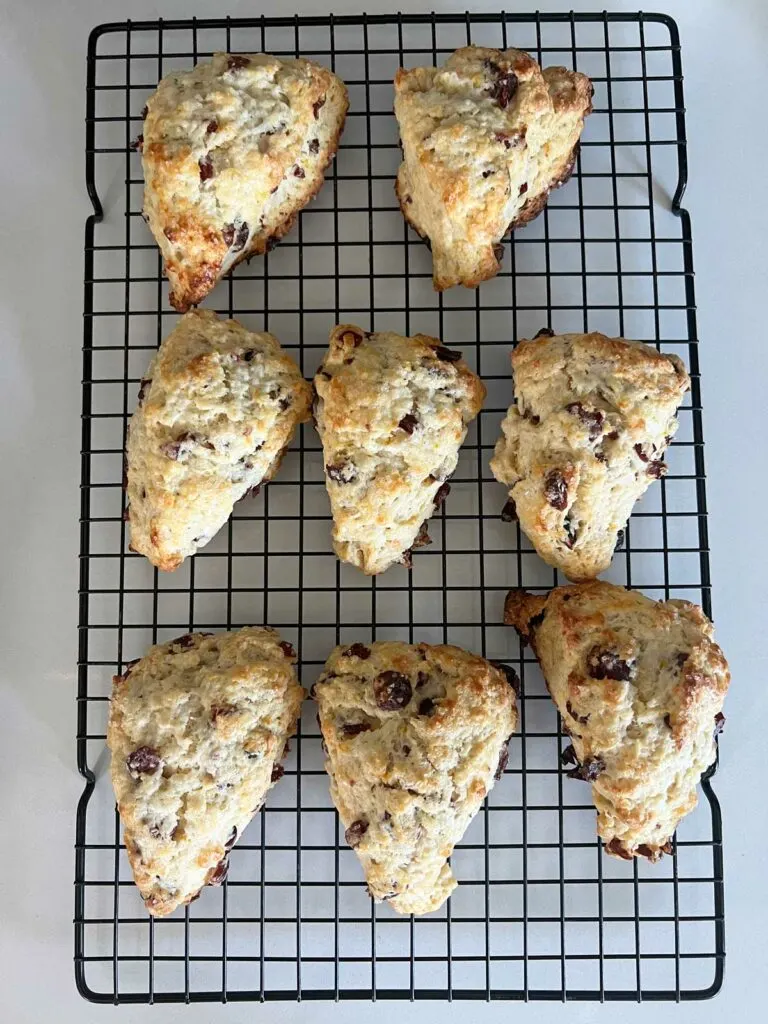
The tops should have just a few areas that have lightly browned, and the bottoms should be uniformly golden brown, without being burned.


Take a spatula and place your cooked scones on a wire rack to cool completely.

These are best eaten fresh, but you can place your fully cooled scones in an airtight container on your kitchen counter for up to 2 days. Make sure they are fully cooled to room temperature before storing in your container otherwise you will get condensation and your scones will get wet.
These are the perfect scones to enjoy with a cup of tea or coffee in the morning, or anytime you want a tasty treat! We hope you enjoy making this orange scone recipe with cranberries. Let us know how you like it!


Orange Scones with Cranberries
Flakey, delicious cranberry orange scones.
Ingredients
- 2 cups all-purpose flour
- 1/3 cup sugar
- 1 and 1/4 teaspoon baking powder
- 1/4 teaspoon baking soda
- 1/4 tsp salt
- 1/2 cup cold unsalted butter (1 stick) - grated
- 3/4 cup buttermilk (+ a little more to brush on top scones)
- 1 teaspoon vanilla extract
- Zest of one large orange
- 1 cup dried cranberries - chopped
- Large crystal sugar to sprinkle on top of scones
Instructions
- Place 1 stick of butter (1/2 pound) into the freezer and leave it there for at least 10 minutes.
- Using a microplane grater, zest 1 large orange. Don't go too deep because the white pith is bitter.
- In a large bowl, add all the dry ingredients: 2 cups all-purpose flour (275g), 1/3 cup sugar, 1 1/4 tsp baking powder, 1/4 teaspoon baking soda, 1/4 teaspoon salt. Mix everything together with a large fork.
- Using a cheese grater (one with large holes that you would use for grating something like mozzarella), carefully grate the entire stick of frozen butter.
- Add the shredded butter to the flour mixture and mix up with a large fork, breaking up any clumps.
- Add the orange zest and mix lightly.
- Add the chopped cranberries and mix until incorporated.
- In a Pyrex measuring cup, measure out 3/4 cup of buttermilk and then add 1 teaspoon of vanilla extract to the buttermilk.
- Make a well in the flour mixture and pour the buttermilk/vanilla mixture into the well.
- Use your fork to keep stirring until the flour is just incorporated. You don't want to overmix the batter otherwise the scones will be too dense.
- Once most of the flour has been incorporated, use your hands to grab the bottom of the dough ball and turn it upsidedown in the bowl. Gently keep turning your dough until any loose flour has been mixed in.
- Use your hands to gently press the dough into one cohesive dough ball so that it stays together.
- Pick up the dough ball with your hands and place it on top of a lightly floured cutting board or counter. Gently press down with your hands until the disk is about 1 1/4 inches thick.
- Press the sides of the disk with your hands to smooth out the edges.
- Using a stainless steel bench scraper, or a large, sharp knife, cut the disk in half like you're cutting a pie. Then cut each half in half, to make quarters.
- Then cut each quarter in half. You will end up with 8 triangular shaped scones.
- Use a pastry brush to brush the tops of the scones with cold buttermilk. Then sprinkle some large crystal sugar on top of each scone.
- Line a large cookie sheet with unbleached parchment paper and place all the scones on top, leaving about 2 inches or so between each scone.
- Preheat your oven to 400°F. While you wait, place your cookie sheet with the scones in the fridge to chill (or even in the freezer if you have room). This will chill the butter further, resulting in a flakier scone.
- Once your oven is up to temperature, place your cookie sheet in the oven on the middle rack and bake for about 20 minutes. When they're done, the tops should have a few areas that have lightly browned, and the bottoms should be uniformly golden brown without being burned.
- Using a spatula, transfer each scone to a wire rack to cool completely.
Notes
These scones are best eaten fresh. Once they are cooled completely, you can place them in an airtight container for up to 2 days.
Instead of mixing with a fork, you can also use a kitchen aid mixer with a dough hook on low speed.
Once you have cut the scones out of the disk of dough (but BEFORE you brush with buttermilk), you can flash freeze your scones for an hour in the freezer, and then store them in a freezer bag for up to 3 months. Once you are ready to bake, pick back up starting at step #17 in this recipe. It's great to have frozen ones on hand that you can bake fresh anytime you need them!
Nutrition Information:
Yield: 8 Serving Size: 1Amount Per Serving: Calories: 383Total Fat: 14gSaturated Fat: 8gTrans Fat: 0gUnsaturated Fat: 5gCholesterol: 32mgSodium: 247mgCarbohydrates: 60gFiber: 2gSugar: 26gProtein: 5g
Nutrition values are merely estimates and aren't always accurate.